Installation and setup
This page covers installing RiskScape using a zip file.
Installation steps
Warning
If RiskScape is already installed on your system, then follow the Upgrading RiskScape instructions instead.
Note
RiskScape is also available via a docker image. Please get in contact with the project team if you want to use docker.
Prerequisites (Java)
RiskScape currently requires a Java Runtime Environment of at least version 17 to run.
For instructions on installing Java on many Operating Systems refer to How to download and install pre-built Java packages.
Note
Be careful to install Java 17 or greater. Googling Java installation instructions may sometimes give you instructions for Java 8, which will not work with RiskScape.
After installation, use a terminal, Windows Command Prompt or PowerShell and run:
java -version
The result of this command should be similar to:
java version "17.x.y"

Java(TM) SE Runtime Environment (build 17...)

Java HotSpot(TM) 64-Bit Server VM (build 17..., mixed mode)
Tip
You may need administrator privileges to install Java, or for elsewhere in this guide where systems settings are edited. Check with your System Administrator if you hit a permissions problem.
Download the latest version of the RiskScape software
Download the latest RiskScape zip file.
Extract the downloaded zip file to your file system, e.g.
C:\RiskScapeWindows/opt/riskscapeLinux or Mac
Tip
You can install RiskScape into any directory location you want, but make sure
you adjust the file-path you use in subsequent instructions on this page.
We recommend you do not extract the riskscape.zip directly into C:\Users\%USERNAME%\
as this may make upgrading RiskScape more complicated.
RiskScape can now be tested by entering the following commands (adjust the paths if necessary):
C:\RiskScape\riskscape\bin\riskscape.bat --helpWindows/opt/riskscape/riskscape/bin/riskscape --helpLinux or Mac
Tip
If RiskScape fails to start with an error message like:
Exception in thread "main" java.lang.UnsupportedClassVersionError: nz/org/riskscape/engine/cli/Main has been compiled by a more recent version of the Java Runtime
Then your version of Java does not meet the minimum required standard. Refer to Prerequisites (Java)
Make the RiskScape command available
The next step is to make RiskScape easier to run, so that we can simply type riskscape
instead of specifying the full executable path every time.
One approach is to edit the system PATH environment variable.
This is the simplest approach for Linux and Mac users.
For Windows users, the latest RiskScape software comes bundled with a shortcut script to make running RiskScape on Windows a little simpler. We recommend Windows users try this approach first, however, advanced users can also Update PATH on Windows.
Note
Skip ahead to the section below that applies to your operating system.
Update PATH (Linux)
For example, a Linux user would update the PATH by adding the following to their
~/.bashrc file:
export "PATH=$PATH:/opt/riskscape/riskscape/bin/"
Adjust the /opt/riskscape/ location accordingly to match your installation directory.
Once you have saved the ~/.bashrc file, open a new terminal and enter riskscape --help to check that the
riskscape command is now visible on your PATH.
Tip
Refer here for more details on how to edit the PATH environment variable for various operating systems.
Once you have successfully updated your PATH, you can skip ahead to Installing a GIS application.
Update PATH (Mac)
A Mac user would add the RiskScape path to a /etc/paths.d/riskscape text file.
Here’s an example of how to do that:
Open a new terminal window and type the following to edit the new file:
sudo nano /etc/paths.d/riskscape
Add the full file path where you extracted RiskScape there. For example, if you extracted the
riskscape.zipfile in your ‘Downloads’ directory, then the file path to use would be/Users/YOUR_USERNAME/Downloads/riskscape/bin/Save the file (in
nano, typeCtrl+Xand follow the instructions)Open a new terminal and enter
riskscape --helpto check that theriskscapecommand is now visible on yourPATH
Tip
If you get an error that riskscape cannot be found, try checking the path in
the /etc/paths.d/riskscape file. Copy the path, open a new terminal, type cd, space,
paste in the path, and then hit enter. If the cd command produces an error, then you
have probably gotten the path wrong.
Once you have successfully updated your PATH, you can skip ahead to Installing a GIS application.
Desktop shortcut (Windows)
For Windows users, instead of permanently changing your PATH setting, you can add a small Desktop shortcut script that
will do this each time you want to use RiskScape.
Note
- If they don’t already exist, this shortcut will create:
C:\Users\%USERNAME%\RiskScape\Projects\(top-level project directory)C:\Users\%USERNAME%\RiskScape\settings.ini(for additional RiskScape settings, such as CPython)
Top-level Windows project directory
The shortcut script will open a command prompt in C:\Users\%USERNAME%\RiskScape\Projects.
This is a top-level ‘Projects’ directory where you can keep all your project sub-directories.
Under this top-level directory, you can use separate sub-directories as needed
to organize your RiskScape models.
E.g. C:\Users\%USERNAME%\RiskScape\Projects\getting-started\
A RiskScape project is the ‘working directory’ where you will run RiskScape commands from.
It should contain a plain-text project.ini file, which you can create and edit in Notepad.
Tip
Running the shortcut will open the command prompt in the C:\Users\%USERNAME%\RiskScape\Projects directory.
From there, you then use the cd DIRECTORY_NAME command to ‘change directory’ to
the project you want to work on.
Windows Command prompt shortcut
To create a Desktop shortcut for running RiskScape from a Windows command prompt:
In File Explorer, open the folder where you extracted the RiskScape zip file.
Right-click on the
riskscape_promptbatch file, click ‘Properties’, and then click ‘Unblock’ under the ‘Security’ section at the bottom. This should stop Windows complaining when you try to run the RiskScape batch file directly.
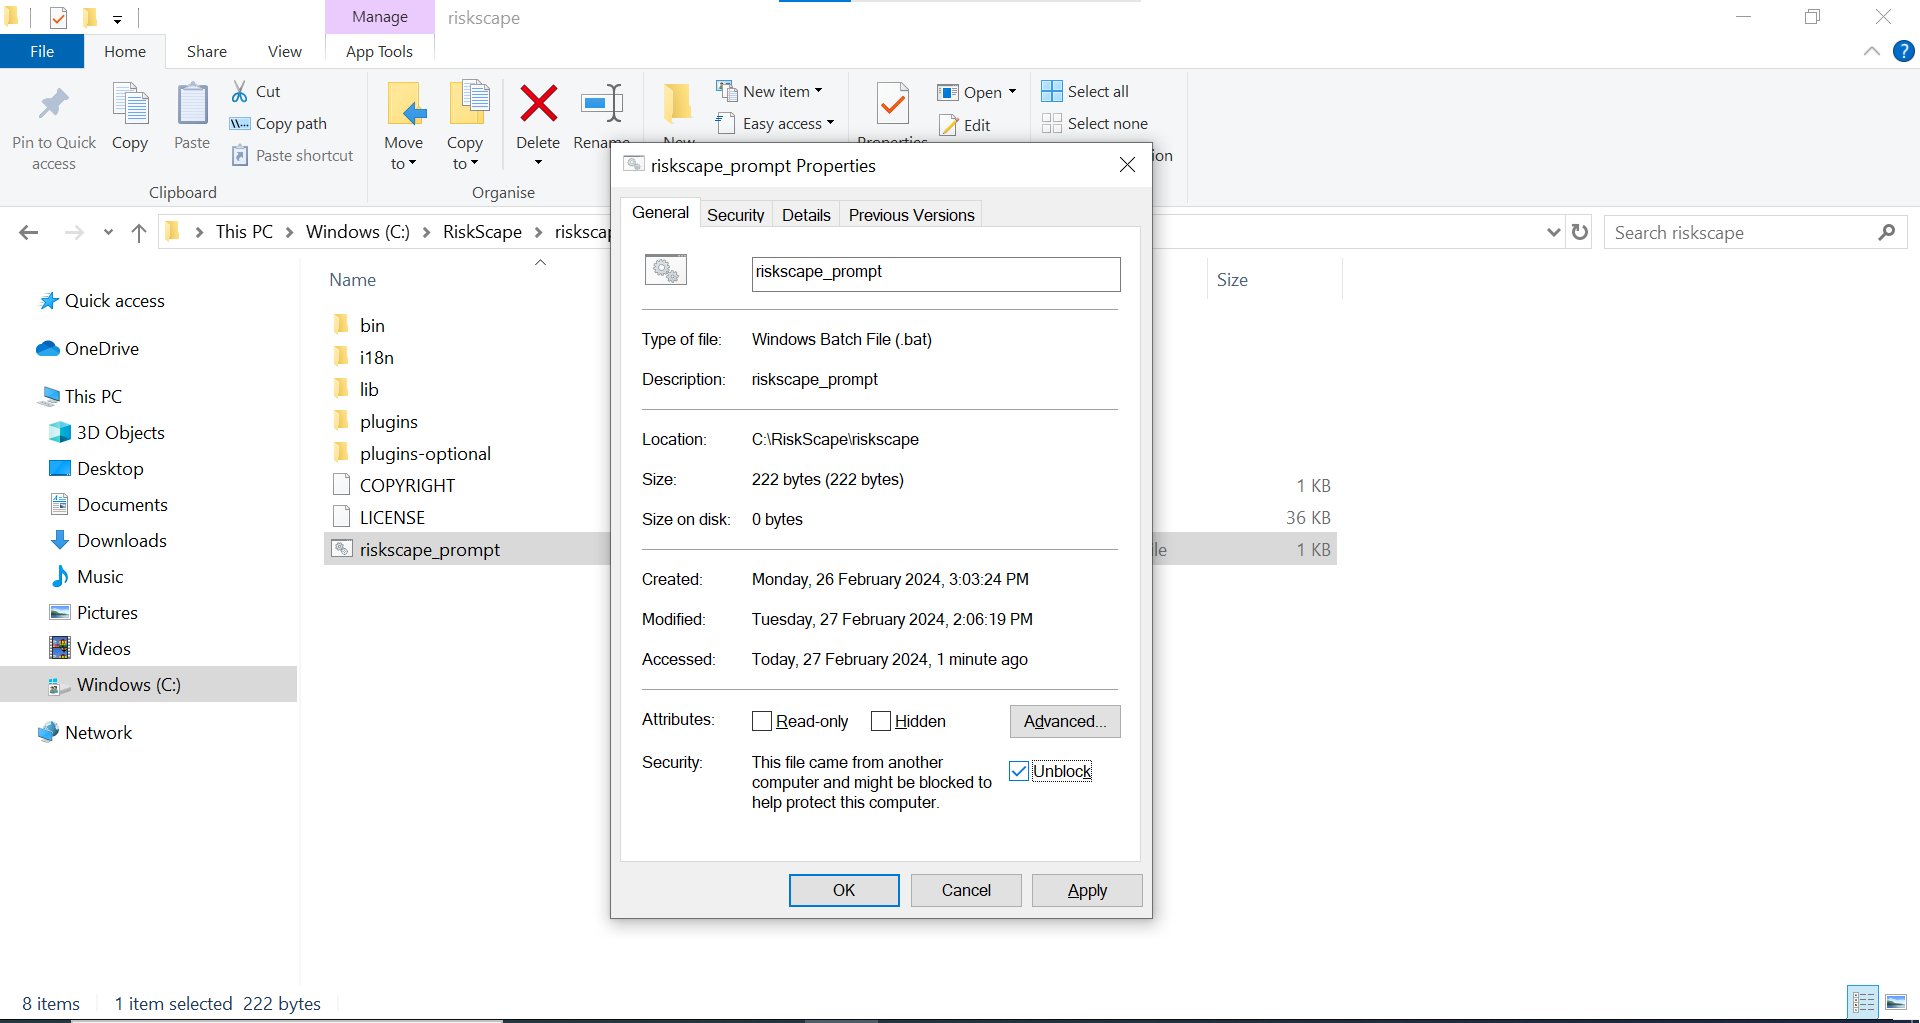
Note
These instructions are encouraging you to skip a security check here, for simplicity. You should take your own steps to verify the batch file is appropriate to use, such as scanning the file with your antivirus software.
3. Right-click on the riskscape_prompt batch file again, and select “Create shortcut”.
A new file riskscape_prompt - Shortcut will appear.
4. Move the shortcut (either by dragging or cut + paste) to a convenient location, such as the desktop.
You could rename the shortcut to just Riskscape now, if you like.
5. Test the shortcut works. Go to your desktop and double-click on it.
A command prompt should open. Type riskscape --help and check it works.
Tip
If you prefer using PowerShell to Windows Command Prompt, you can create your own shortcut script. An alternative PowerShell shortcut example has been provided as a starting point for PowerShell users.
Installing a GIS application
We recommend that you have also a GIS application installed on your system that you can use to view GIS data, such as shapefiles and GeoTIFF files. This will help to visualize the RiskScape input and output data.
Common GIS applications include QGIS and ArcGIS.
Note
There are some known interoperability issues with shapefile projections in ArcGIS. If your preferred GIS application is ArcGIS, then refer to Workarounds for ArcGIS for more details.
You can download QGIS from here.
Note
Follow the QGIS instructions carefully. Mac users, pay attention to the note in the QGIS instructions about security rules.
QGIS has a lot of online documentation on how to use it and how to work with GIS data. You should also be able to find many ‘how to’ videos for using QGIS online.
Jupyter notebook
It is possible to run RiskScape from a Jupyter notebook. If you’re familiar with Jupyter and want to use that environment, have a look at Using RiskScape with Jupyter Notebook